
Stack of application I am currently working on at Dotsub is based on Java/Spring Boot back-end and React/Redux front-end. To have confidence that this application works end to end, we are using Selenium tests. It is very easy to run them as part application build, because Spring Boot testing support allows to run full application as part of application build. We use Gradle as main build system and it is all running on Travis continuous integration server. To demonstrate this approach for end to end testing I created small Hello World project on GitHub.
Build
Build system of choice is Gradle. Creation of following Gradle script was very easy, because I used Spring Initializr:
buildscript {
	ext {
		springBootVersion = '1.3.2.RELEASE'
	}
	repositories {
		mavenCentral()
	}
	dependencies {
		classpath("org.springframework.boot:spring-boot-gradle-plugin:${springBootVersion}")
	}
}

apply plugin: 'java'
apply plugin: 'idea'
apply plugin: 'spring-boot'

jar {
	baseName = 'blog-2016-01-selenium-on-travis'
	version = '0.0.1-SNAPSHOT'
}

sourceCompatibility = 1.8
targetCompatibility = 1.8

repositories {
	mavenCentral()
}


dependencies {
	compile('org.springframework.boot:spring-boot-starter')
	compile('org.springframework.boot:spring-boot-starter-web')
	testCompile('org.springframework.boot:spring-boot-starter-test')
    testCompile("org.seleniumhq.selenium:selenium-firefox-driver:2.49.0")
    testCompile('org.seleniumhq.selenium:selenium-support:2.49.0')
}

task wrapper(type: Wrapper) {
	gradleVersion = '2.9'
}
The only additional dependencies against generated script (by Spring Initializr) are Selenium, Firefox Selenium driver and Spring Starter Web. Adding spring-boot-starter-web into build will transform our project into web application with embedded Tomcat servlet container.
Hello World Application
To demonstrate Selenium Tests automation, I created very simple application code. First of all we need Spring Boot main class:
package net.lkrnac.blog.seleniumontravis;

import org.springframework.boot.SpringApplication;
import org.springframework.boot.autoconfigure.SpringBootApplication;

@SpringBootApplication
public class Application {
    public static void main(String... args){
        SpringApplication.run(Application.class);
    }
}
It is very standard Spring Boot construct for Spring context initialization. Annotation @SpringBootApplication turns on Spring Boot auto-configuration. It sets up most sensible defaults for out application, which is most importantly embedded servlet container in this case.
Second part of our simple application code is front-end code. For demonstration purposes this simplest React example (taken from React getting started guide) will be enough:
<!DOCTYPE html>
<html>

<head>
    <meta charset="UTF-8" />
    <title>Hello React!</title>
    <script src="https://cdnjs.cloudflare.com/ajax/libs/react/0.14.7/react.min.js"></script>
    <script src="https://cdnjs.cloudflare.com/ajax/libs/react/0.14.7/react-dom.min.js"></script>
    <script src="https://cdnjs.cloudflare.com/ajax/libs/babel-core/5.8.23/browser.min.js"></script>
</head>

<body>
<div id="hello" />

<script type="text/babel">
    ReactDOM.render(
    <h1>Hello, world!</h1>, document.getElementById('hello') );
</script>
</body>

</html>
It uses Babel to transpile JSX inline and pulls React libraries from CDN. It doesn’t do any AJAX calls to server. We also didn’t create any Spring controller for serving requests. It is because goal of this example is to demonstrate Selenium testing against React+Spring Boot app, therefore I skipped communication between client and server.
This simple HTML + React Hello World page is located in file src/main/resources/static/index.html, where it will be picked up by Spring Boot and exposed as default web page content when request hits root URL of embedded servlet container.
Simple Selenium Test
Following listing shows how can we approach selenium testing against Spring Boot application:
import net.lkrnac.blog.seleniumontravis.Application;
import org.junit.AfterClass;
import org.junit.BeforeClass;
import org.junit.Test;
import org.junit.runner.RunWith;
import org.openqa.selenium.By;
import org.openqa.selenium.firefox.FirefoxDriver;
import org.openqa.selenium.support.ui.ExpectedConditions;
import org.openqa.selenium.support.ui.WebDriverWait;
import org.springframework.boot.test.SpringApplicationConfiguration;
import org.springframework.boot.test.WebIntegrationTest;
import org.springframework.test.context.junit4.SpringJUnit4ClassRunner;
import java.io.IOException;
@RunWith(SpringJUnit4ClassRunner.class)
@SpringApplicationConfiguration(Application.class)
@WebIntegrationTest
public class ApplicationTest {
private static FirefoxDriver driver;
@BeforeClass
public static void setUp() throws IOException {
driver = new FirefoxDriver();
}
@Test
public void contextLoads() {
driver.get("https://localhost:8080");
WebDriverWait wait = new WebDriverWait(driver, 10);
wait.until(ExpectedConditions.textToBePresentInElementLocated(
By.id("hello"), "Hello, world!"));
}
@AfterClass
public static void tearDown() {
driver.quit();
}
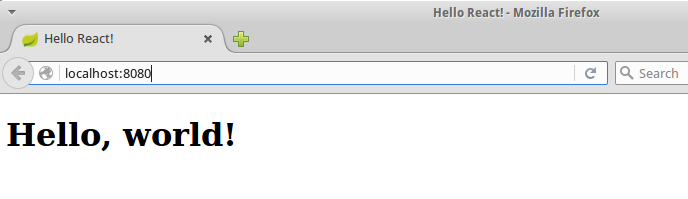
}Before test, it starts Firefox Selenium driver. During test it visits default specified address https://localhost:8080. This should hit our index.html. Next phase of the test is waiting for Hello, world! header to be rendered on screen. After this happens, test is done and Selenium driver is closed. When we run this test locally, we can see following pop-up appear on the screen.
Travis Configuration
Last piece of this example it TravisCI configuration manifest. Relevant parts of it are here:
language: java
jdk:
  - oraclejdk8

before_script:
  - "export DISPLAY=:99.0"
  - "sh -e /etc/init.d/xvfb start"
  - sleep 3 # give xvfb some time to start

script: ./gradlew build --continue
First of all we specify that Java 8 is our language of choice. Before script part is taken from TravisCI docs. It starts Xvfb (X virtual frame buffer), which simulates X11 display server on Linux machine without screen. This allows render our site virtually, because TravisCI build machine contains installation of Firefox by default. This configuration is enough for Selenium tests. In script phase we start full Gradle build.
Possible Travis problems and solution
All this configuration may be enough for you to start simple Selenium testing again React application. But default Firefox version on TravisCI machine is 31.0 ESR. This is quite old version and some of our React pages may not be rendered correctly during the build. Luckily TravisCI allows to update Firefox version with this simple manifest declaration:
addons:
  firefox: "44.0"
This installs new version of Firefox on TravisCI, but unfortunately it is not enough because of this open TravisCI issue. Consequence is that default configuration of Selenium Firefox driver configuration use old Firefox binary instead of new one.
But when I executed which firefox command on Travis, it was pointing to new binary file. Therefore I used this Selenium Driver initialization to pick up newer Firefox binary on Travis:
import net.lkrnac.blog.seleniumontravis.Application;
import org.junit.AfterClass;
import org.junit.BeforeClass;
import org.junit.Test;
import org.junit.runner.RunWith;
import org.openqa.selenium.By;
import org.openqa.selenium.firefox.FirefoxBinary;
import org.openqa.selenium.firefox.FirefoxDriver;
import org.openqa.selenium.firefox.FirefoxProfile;
import org.openqa.selenium.support.ui.ExpectedConditions;
import org.openqa.selenium.support.ui.WebDriverWait;
import org.slf4j.Logger;
import org.slf4j.LoggerFactory;
import org.springframework.boot.test.SpringApplicationConfiguration;
import org.springframework.boot.test.WebIntegrationTest;
import org.springframework.test.context.junit4.SpringJUnit4ClassRunner;

import java.io.BufferedReader;
import java.io.File;
import java.io.IOException;
import java.io.InputStreamReader;

@RunWith(SpringJUnit4ClassRunner.class)
@SpringApplicationConfiguration(Application.class)
@WebIntegrationTest
public class UseNewFirefoxOnTravisTest {
    private static FirefoxDriver driver;

    @BeforeClass
    public static void setUp() throws IOException {
        String travisCiFlag = System.getenv().get("TRAVIS");
        FirefoxBinary firefoxBinary = "true".equals(travisCiFlag)
                ? getFirefoxBinaryForTravisCi()
                : new FirefoxBinary();

        driver = new FirefoxDriver(firefoxBinary, new FirefoxProfile());
    }

    private static FirefoxBinary getFirefoxBinaryForTravisCi() throws IOException {
        String firefoxPath = getFirefoxPath();
        Logger staticLog = LoggerFactory.getLogger(UseNewFirefoxOnTravisTest.class);
        staticLog.info("Firefox path: " + firefoxPath);

        return new FirefoxBinary(new File(firefoxPath));
    }

    private static String getFirefoxPath() throws IOException {
        ProcessBuilder pb = new ProcessBuilder("which", "firefox");
        pb.redirectErrorStream(true);
        Process process = pb.start();
        try (InputStreamReader isr = new InputStreamReader(process.getInputStream(), "UTF-8");
             BufferedReader br = new BufferedReader(isr)) {
            return br.readLine();
        }
    }

    @Test
    public void contextLoads() {
        driver.get("https://localhost:8080");
        WebDriverWait wait = new WebDriverWait(driver, 10);
        wait.until(ExpectedConditions.textToBePresentInElementLocated(
                By.id("hello"),
                "Hello, world!")
        );
    }

    @AfterClass
    public static void tearDown() {
        driver.quit();
    }
}
Testing logic is the same as for example test we already introduced. Different is initialization of Firefox Selenium driver. In this case we first recognize if we are running in Travis environment via environment variable TRAVIS. If we are not running in Travis, we use default Firefox driver initialization.
If we are running in TravisCI build, we use standard Java class ProcessBuilder to execute Linux command which firefox in separate process and grab it’s output. This gives us path of newer Firefox binary. Based on this path, we initialize Firefox Selenium driver and are good to automatically run Selenium test against latest Firefox on TravisCI build machine.
Thanks for the helpful post.
Important : Needed to install Firefox 44.0 for this configuration to work locally. Selenium version in this article does not work with latest Firefox (50.0.2 at this point). (May need to use latest Selenium dependencies. I tried but didn’t work for me).
Yes, there is significant gap in Selenium community in terms of Firefox support. Old FirefoxDriver doesn’t work since FF 47.0 I believe. There is new GeckoDriver (https://github.com/mozilla/geckodriver) being developed which will eventually replace old FirefoxDriver. But as of today I believe it doesn’t support full feature set if web driver and therefore isn’t production ready.
So your best option is to stick with FF 47.0 for now or switch to Chrome.